Kami YI Camera Doorbell Setup Process- Explained
Kami, though not so popular, is among the leading surveillance system manufacturer brands in the market. Just last year, they introduced a new device to the market called the smart yi camera doorbell. This YI camera doorbell setup is the brand new, smart and affordable doorbell camera that can help with your surveillance and monitoring needs. It makes for an excellent addition to your home and comes with features like edge-AI powered facial recognition, two-way audio, smart motion detection, and more.
The battery powered yi camera doorbell is a new product and can have different installation requirements than the other camera models. That’s why learning about how to complete the YI camera doorbell setup becomes important. This blog will walk you through the configuration process for the wireless yi camera doorbell so you can get started with monitoring your home location in no time.
Setting Up home security cameras yi camera doorbell
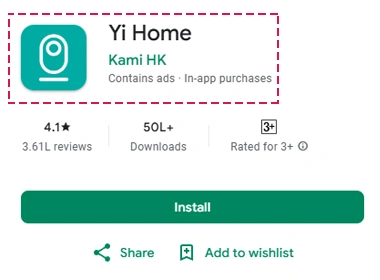
To start with the setup process for your yi camera doorbell with Wi-Fi, you will need to download and install the Kami Home App on your smartphone. Once downloaded, you can proceed with the on-screen steps to pair the doorbell camera with your app.
You can download the app from the App Store or the Play Store as per the device you are using. Once installed, you can launch the same and proceed with the easy steps. The Yi camera is also compatible with the 5GHz network unlike most other cameras in the market that only work with the 2.4GHz band. Here are the steps you can follow to add the camera to the app:
- Launch the app on your smartphone and you will see the Welcome Home screen load up.
- From the Profile option on the top right(circular shape), tap on it and then you will reach the Select Device screen.
- From the list available on the screen, select the smart yi camera doorbell option and you will be taken to the setup screen.
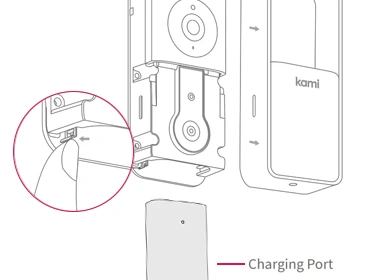
- Now, use a fully charged battery to insert it into the camera. Once you have inserted the battery, the camera will start up automatically. You will see the LED on the doorbell blink which means it is ready for the YI camera doorbell setup.
Connecting Wireless YI Camera Doorbell with WiFi
- Once you hear the ‘Waiting to Connect’ sound play on the doorbell, tap on the ‘I heard Waiting to Connect’ button on the camera.
- The next screen will take you to the WiFi connection screen. From the Connect to WiFi screen, type in the network name and the password and then tap on the Connect to WiFi button at the bottom.
- Follow the voice prompts that play on the doorbell to finish the camera pairing process.
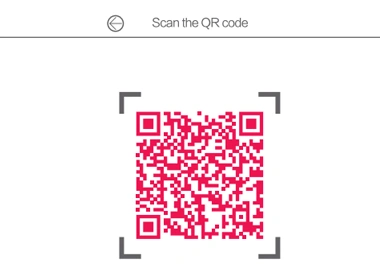
- The app will then generate a QR code for you to scan using the doorbell. Bring the doorbell closer to the smartphone screen so it can scan the code easily. Once done, tap on the Next button.
- Now, allow some time until the camera connects to WiFi. Once done the LED on the camera will become solid white which means that the camera has connected to the app.
- You will also receive the Connection Successful message on the app to indicate that the devices have paired. The YI camera doorbell setup process is now complete.
Installing the Wireless YI Camera Doorbell at your Home
Before installing the camera at your door, ensure that the location where you are installing is at least 4 ft high from the base ground. This will ensure that the camera can cover the maximum field of view and you can capture optimal footage. In addition to the height of the spot, also ensure that this spot is in good coverage range of the wireless network. If not, you might need to use a wireless extender device to ensure proper connectivity. Once finalised, here are some steps you can follow:
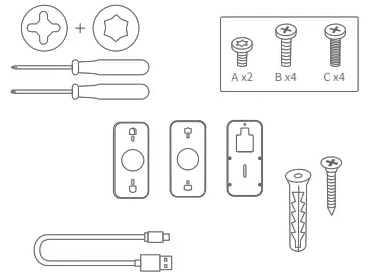
- Take the base plate and mount it to the door where decided. Use the screws and the screwdriver to fix the same to the wall.
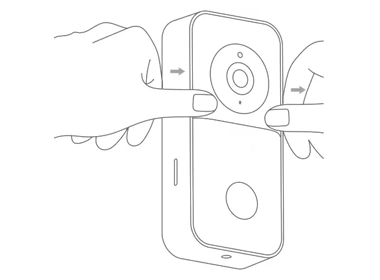
- Now, mount the camera to the mounting plate and secure it in its place. Insert the fully-charged battery to the camera and attach the outer cover to the doorbell to complete the mounting process.
- On the inside, take the chime connector and attach it to the existing chime receiver. You can refer to the steps indicated in the user manual to make the connections and connect the chime connector to the chime. Seek expert help from an electrician if needed.
- Once connected, you can launch the Kami app to see the camera functioning to its best. Test the doorbell by pressing the Ring button on the doorbell. You will now hear a musical chime play in your home.
You have now successfully configured the security cameras YI camera doorbell in your home.
The Kami app can now be used to configure advanced settings related to your YI camera doorbell. These include the features like motion sensing YI camera doorbell, and settings for YI camera doorbell with night vision.
The Final Word
The YI camera doorbell Setup process is easy to complete using the right information at hand. The Kami app can be used to access the network settings and configure the WiFi settings of the device. Once you have added the camera to the app, you can proceed with installation and use it to monitor your main door.